How to configure the plugin?
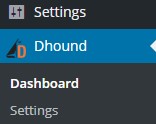 After you have successfully installed the Dhound plugin, you’ll be able to find it in the left-hand main menu.
To configure the Dhound plugin correctly, please follow the steps below:
- Go to the “Settings” sub sections within the “Dhound” section in the main menu.
-
Enter your client access key and server key.

All this information can be found within your Dhound account-
Client access key– Profile->System security->Security keys

-
Server key– Server management->Server->Server info

-
Client access key– Profile->System security->Security keys
- After you have entered the keys, click “Save changes” button to apply configurations.
- Congratulations! Now you’re ready to track Word Press security events within your Dhound account.